I. Setup Instruction
Step 1: Download the iOS app

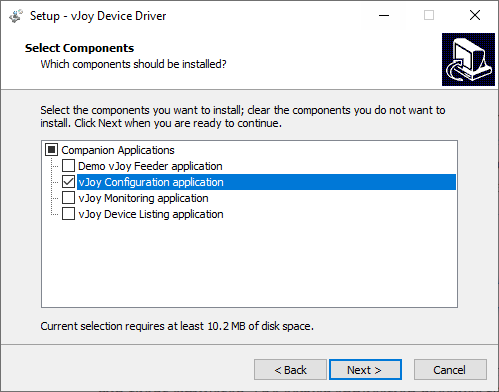
Step 2: Download & Install vJoy Device Driver
Download vJoy Device Driver for Windows (x64)
Make sure you select the vJoy Configuration application when installer prompt you to select components. Other companion applications are not required by FBW.
Step 3: Download & Install FBW Server
Download FBW Server (V1.1) for Windows (x64)
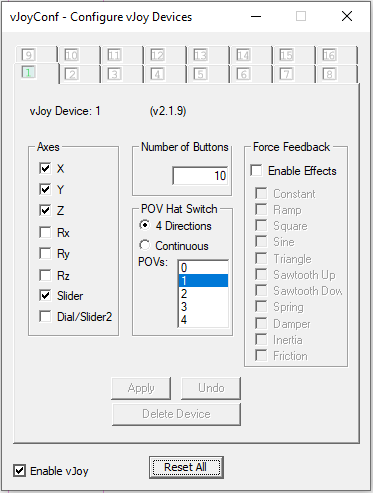
Step 4: Configure vJoy Device
Use Configure vJoy application installed in Step 2 to configure vJoy Device. Make sure to enable X/Y/Z/Slider Axes, set Number of Buttons to at least 10, and configure exactly one 4 Directions POV Hat Switch, as shown in the figure below.
Step 5: Bind Controls
Bind control input to game events just like what you would do with a physical joystick device. Examples are provided in Section III.
In X-Plane 11, when asked to center all controls during calibration, place your phone down on a level surface and tap Calibrate button in the app to center all controls.
II. Go Flying!
Launch the FBW server on your computer and check a few things on the main screen:
- Server IP: The application automatically detects your computer's local IP address. If your computer has only one network interface, you don't need to anything. If your computer has multiple network interface you may want to select IP address manually from the drop down menu to match the interface used for WLAN connection.
- Server Port: The default port that the server listens on is 7773. If default port is taken by another application, you can manually set the port number to something else (1000-65535).
- vJoy Device: Select the vJoy device you want to use. The default device is #1, leave it unchanged unless you're doing some advanced configuration. If there's no device to select from in the drop down menu, make sure you have vJoy device driver correctly installed and refresh with Main-Refresh vJoy Device List.
If configured alright, check Enable, and copy enter IP and Port into the app. Tap the BIG blue button and you'll have full control!

Closing the server window will minimize FBW server to system tray. If you want to exit the application, right click the tray icon, or using the menu bar Main-Quit.
Tips
- If you're tired of holding your device during cruise, tap the yoke icon in the center of the app to temporary disable the X/Y input. FBW will hold your current X/Y input until you tap again to re-enable. Y axis will automatically calibrate to make sure the input is continuous.
- You can adjust axis sensitivity in the settings. Generally, use higher sensitivity for X (roll) axis and lower sensitivity for Y (pitch) axis can make adjustment during a landing easier.
III. Control Binding Examples
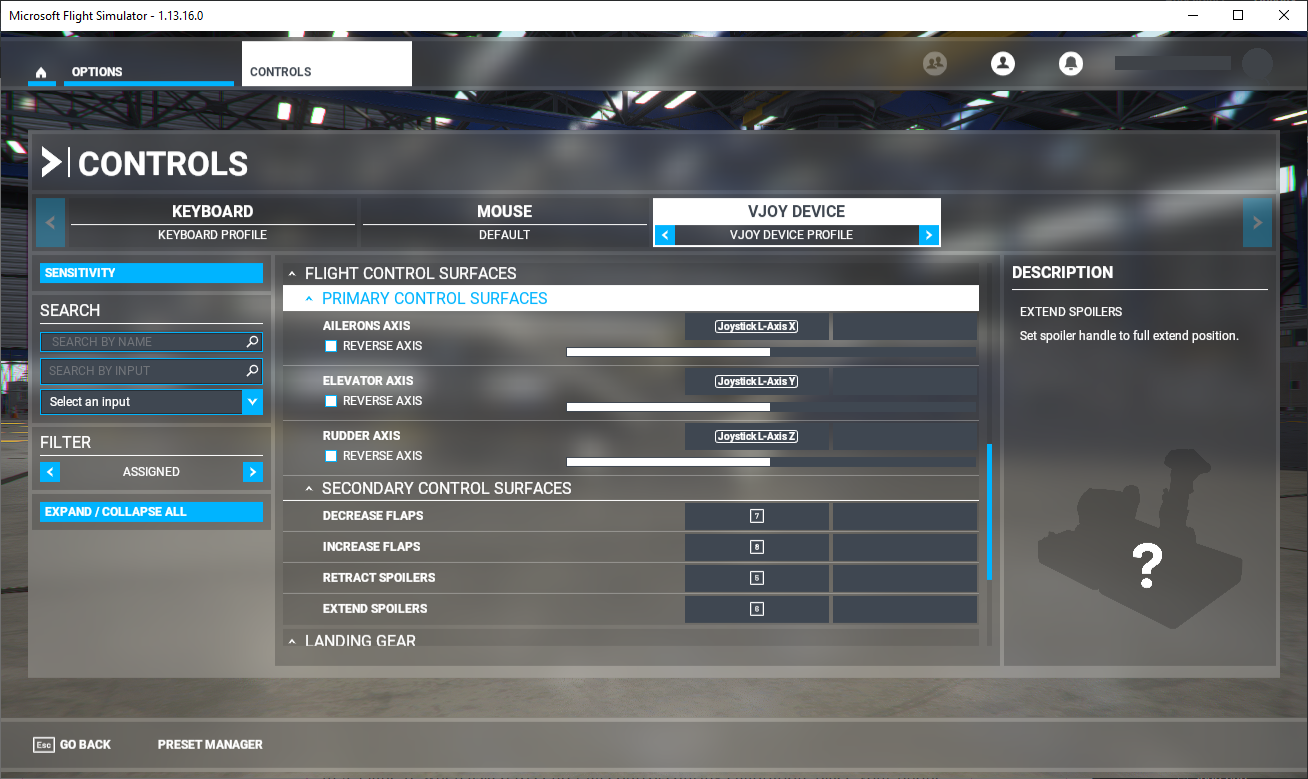
Example 1: Microsoft Flight Simulator (2020)
| In-App Control | Input | Binding |
|---|---|---|
| Device Tilt (Leftward/Rightward) | Joystick L - Axis X | Aileron Axis |
| Device Tilt (Forward/Backward) |
Joystick L - Axis Y | Elevator Axis |
| Left Slider | Joystick L - Axis Z | Rudder Axis |
| Right Slider | Joystick Slider X | Throttle Axis |
| Button 1 | 1 | Brakes |
| Button 2 | 2 | Toggle Smart Camera |
| Button 3 | 3 | Toggle Autopilot Master |
| Button 4 | 4 | Toggle Throttle Reverse Thrust |
| Button 5 | 5 | Retract Spoilers |
| Button 6 | 6 | Extend Spoilers |
| Button 7 | 7 | Decrease Flaps |
| Button 8 | 8 | Increase Flaps |
| Button 9 | 9 | Toggle Parking Brakes |
| Button 10 | 10 | Toggle Landing Gear |
| POV Left | POV Left | Cockpit Quickview Left & External Quickview Left |
| POV Right | POV Right | Cockpit Quickview Right & External Quickview Right |
| POV Up | POV Up | Cockpit Quickview Up & External Quickview Top |
| POV Down | POV Down | Cockpit Quickview Rear & External Quickview Rear |
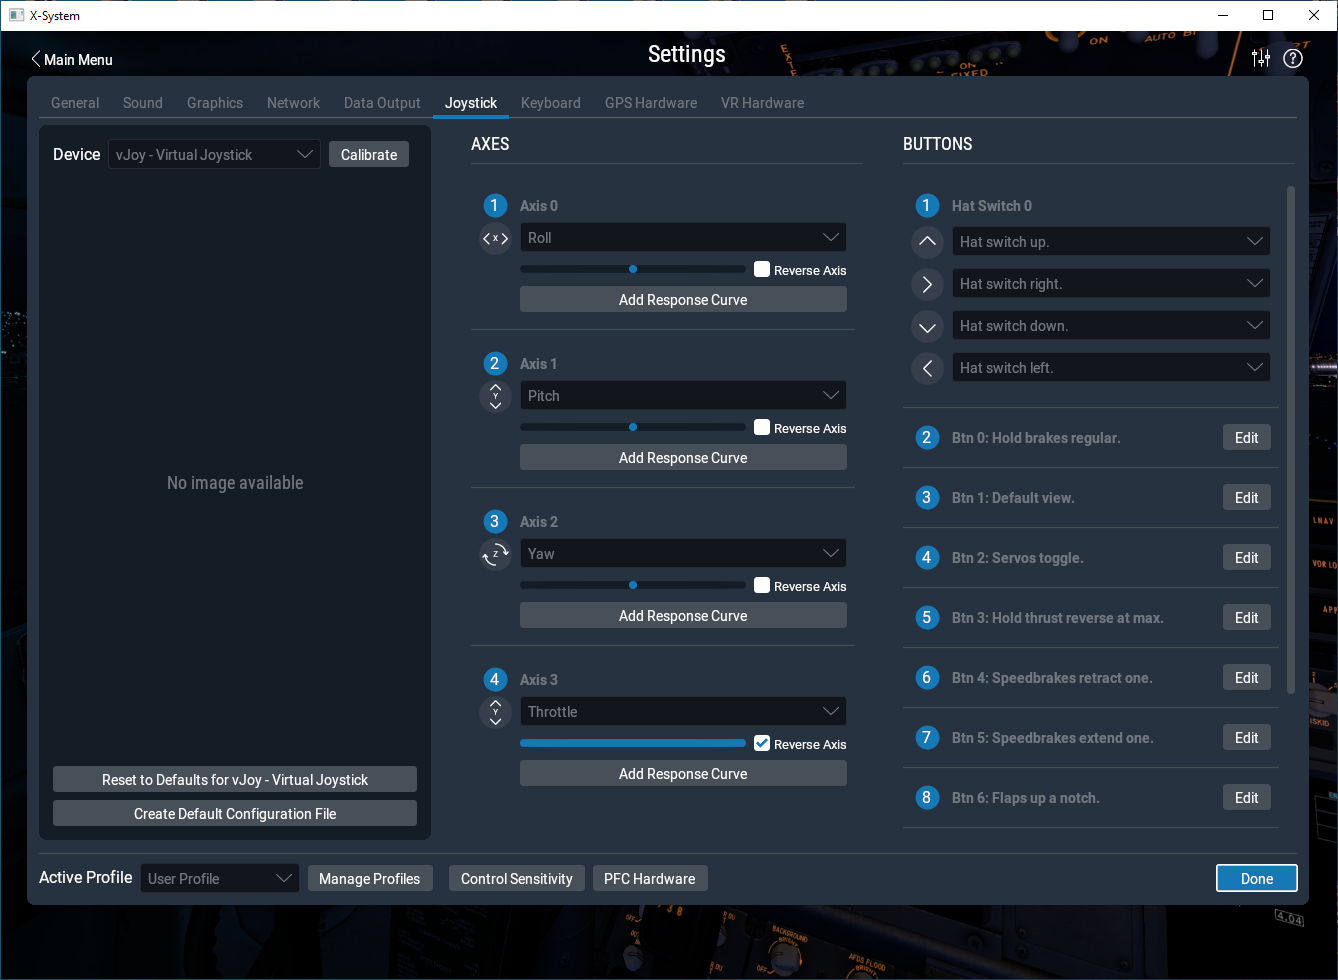
Example 2: X-Plane 11
| In-App Control | Input | Binding |
|---|---|---|
| Device Tilt (Leftward/Rightward) |
Axis 0 | Roll |
| Device Tilt (Forward/Backward) |
Axis 1 | Pitch |
| Right Slider | Axis 2 | Yaw |
| Left Slider | Axis 3 | Throttle |
| Button 1 | Btn 0 | Hold brakes regular |
| Button 2 | Btn 1 | Default view |
| Button 3 | Btn 2 | Toggle servos |
| Button 4 | Btn 3 | Toggle thrust reversers |
| Button 5 | Btn 4 | Speedbrakes retract one |
| Button 6 | Btn 5 | Speedbrakes extend one |
| Button 7 | Btn 6 | Flaps up a notch |
| Button 8 | Btn 7 | Flaps down a notch |
| Button 9 | Btn 8 | Toggle brakes regular effort |
| Button 10 | Btn 9 | Landing gear toggle |
| POV Left | Hat Switch 0 - Left | Hat switch left |
| POV Right | Hat Switch 0 - Right |
Hat switch right |
| POV Up | Hat Switch 0 - Up |
Hat switch up |
| POV Down | Hat Switch 0 - Down |
Hat switch down |